As my trading strategies have been simplified, I'm opening a new thread with updates of my trades. ALL TRADES ARE ON LIVE ACCOUNT.
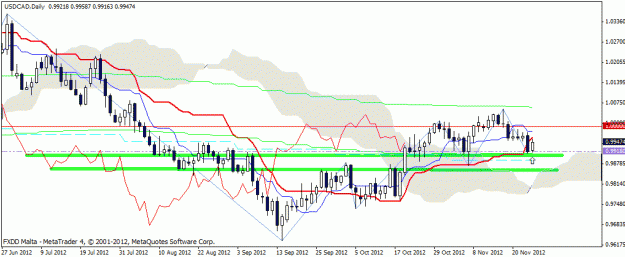
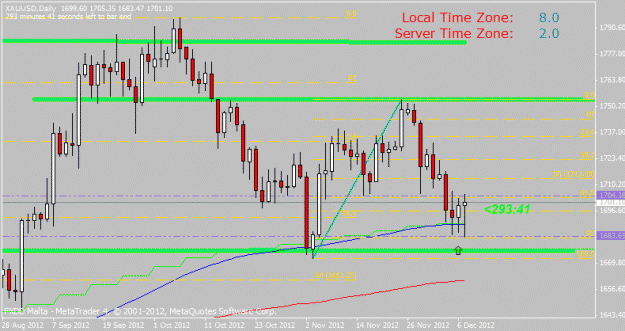
Attached images represent these simplified ways.
Chart setup (use FXDD or Alpari MT4 demo time zone charts, I prefer FXDD):
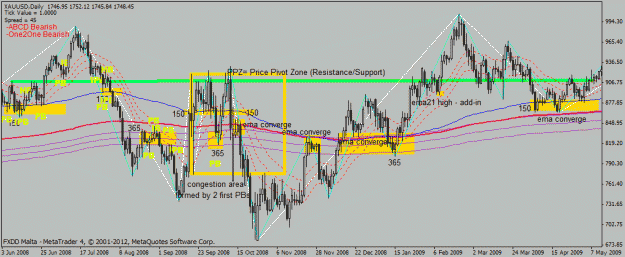
EMA CHART:
1. EMA's - 365 (high, low, middle, representing rather large potential interest zone PIZ), 275, 150, 21 (high, low, middle, as a band, used primarily for adding into existing trades when the trend took off, sometimes for new trades if original ones have been stopped out by trailing)
2. Koharmonics indicator - simply, I don't trade harmonics very much, and want to just keep an eye on them, hence the use of this convenient indicator)
3. Swings (zigzag set to 10, 5, 3) - often I use these swings to put Fibs retracements
4. Fibs: all standard, add in 70.6, and 87.5 & 12.5 - these are price zones where the trend can reverse without giving 100% double top or double bottom. I'm most interested in 50%
Basically what I'm looking for is PIZ (potential interest zone) marked dark-yellow on the chart. When price approaches PIZ I'm watching for the development of the following TRIGGERS:
1. PB - Pin Bar
2. IPB - Inside Pin Bar
3. IB - Inside Bar (the smaller the better, the best when IBs get smaller one inside the other)
4. NB - Neutral Bar aka Doji
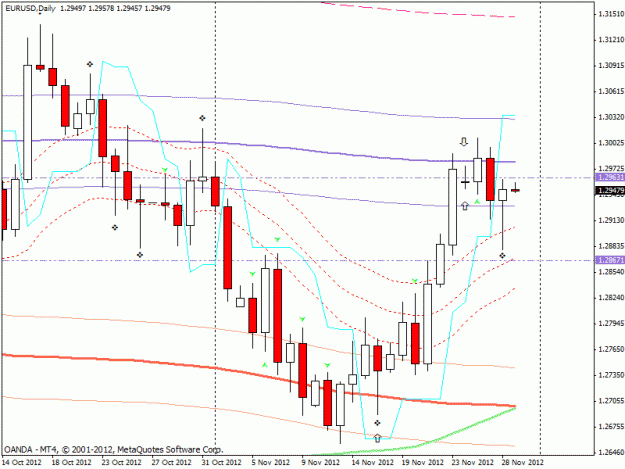
On Oanda charts I use the same as before: 200 SMA and 120 SMA I add EMA 21 (H,L,M).
Either I will trade on the open or on the breakout of the bar high in an uptrend (or low in a downtrend).
I like when the PIZ is confirmed with specific retacement, especially 50% retrace. Put it another way: I like 50% retrace confirmed with an area supported by one or more of the EMAs.
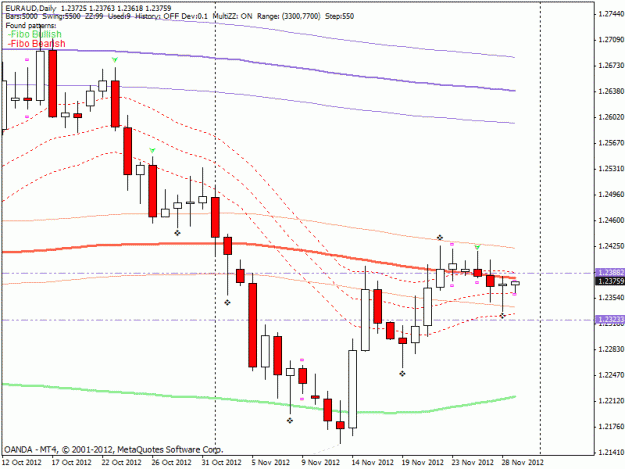
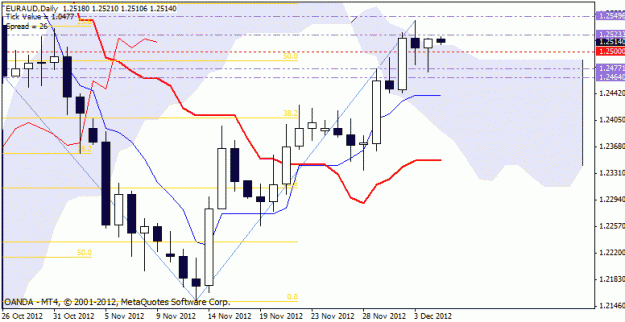
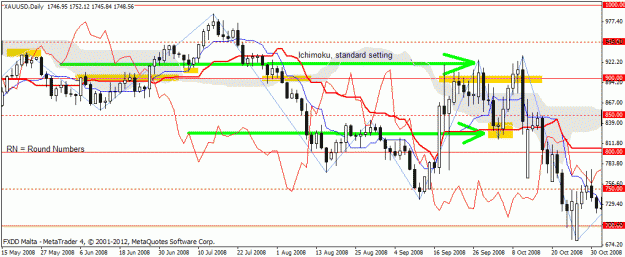
ICHIMOKU CHART
My recent interest in revisiting Ichi gave me some new insight. Very simple and basic:
1. "Ichi" - Ichimoku Kinkyo-Ho standard settings
2. RN - Round Numbers
Here I especially like to use cloud as Support/Resistance zones, the Chinko span which is very helpful with identifying future PPZ (Price Pivot Zones). I will not trade on RN alone, seldom on Ichi alone, but if the 2 converge and one of the trigger bars developed, I will look into it and decide.
RISK
About 1-3% on each trade. But I use fixed $ amount, for example on account of USD4,000, I would risk between USD55 to USD150 on each trade. If a loss, I will not decrease the amount risked, until there is USD1000 loss. I will not increase the amount risked until I've made at least 50% profit.
I look at the charts once a day. I live in East Asia now, so for me it will be at 5am (if previous night the price was approaching PIZ) and 1pm (depends on summer time savings change). That's all.
TRADE MANAGEMENT:
Stops are below the entry bar. I divide the trade into 2 parts. So it can be for example 2 mini lots, or 20 microlots, or amount, i.e.: if my excel sheet calculates risk of 2700 units of EUR (I trade with Oanda hence the units, not lots) I will enter 2 orders each 1350 units.
First half of the trade is closed at a specific target, usually 2:1 or better.
Second half I trail with ATR-EMA Stops set to 2,2,2.
Attached images represent these simplified ways.
Chart setup (use FXDD or Alpari MT4 demo time zone charts, I prefer FXDD):
EMA CHART:
1. EMA's - 365 (high, low, middle, representing rather large potential interest zone PIZ), 275, 150, 21 (high, low, middle, as a band, used primarily for adding into existing trades when the trend took off, sometimes for new trades if original ones have been stopped out by trailing)
2. Koharmonics indicator - simply, I don't trade harmonics very much, and want to just keep an eye on them, hence the use of this convenient indicator)
3. Swings (zigzag set to 10, 5, 3) - often I use these swings to put Fibs retracements
4. Fibs: all standard, add in 70.6, and 87.5 & 12.5 - these are price zones where the trend can reverse without giving 100% double top or double bottom. I'm most interested in 50%
Basically what I'm looking for is PIZ (potential interest zone) marked dark-yellow on the chart. When price approaches PIZ I'm watching for the development of the following TRIGGERS:
1. PB - Pin Bar
2. IPB - Inside Pin Bar
3. IB - Inside Bar (the smaller the better, the best when IBs get smaller one inside the other)
4. NB - Neutral Bar aka Doji
On Oanda charts I use the same as before: 200 SMA and 120 SMA I add EMA 21 (H,L,M).
Either I will trade on the open or on the breakout of the bar high in an uptrend (or low in a downtrend).
I like when the PIZ is confirmed with specific retacement, especially 50% retrace. Put it another way: I like 50% retrace confirmed with an area supported by one or more of the EMAs.
ICHIMOKU CHART
My recent interest in revisiting Ichi gave me some new insight. Very simple and basic:
1. "Ichi" - Ichimoku Kinkyo-Ho standard settings
2. RN - Round Numbers
Here I especially like to use cloud as Support/Resistance zones, the Chinko span which is very helpful with identifying future PPZ (Price Pivot Zones). I will not trade on RN alone, seldom on Ichi alone, but if the 2 converge and one of the trigger bars developed, I will look into it and decide.
RISK
About 1-3% on each trade. But I use fixed $ amount, for example on account of USD4,000, I would risk between USD55 to USD150 on each trade. If a loss, I will not decrease the amount risked, until there is USD1000 loss. I will not increase the amount risked until I've made at least 50% profit.
I look at the charts once a day. I live in East Asia now, so for me it will be at 5am (if previous night the price was approaching PIZ) and 1pm (depends on summer time savings change). That's all.
TRADE MANAGEMENT:
Stops are below the entry bar. I divide the trade into 2 parts. So it can be for example 2 mini lots, or 20 microlots, or amount, i.e.: if my excel sheet calculates risk of 2700 units of EUR (I trade with Oanda hence the units, not lots) I will enter 2 orders each 1350 units.
First half of the trade is closed at a specific target, usually 2:1 or better.
Second half I trail with ATR-EMA Stops set to 2,2,2.
Attached Image(s) (click to enlarge)
Paul W