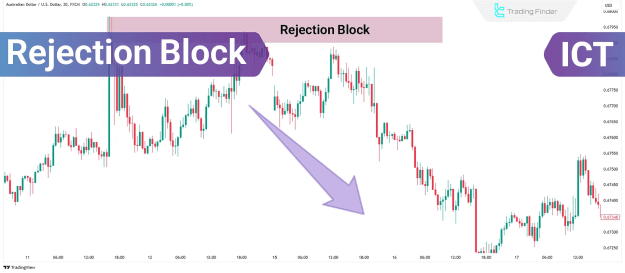
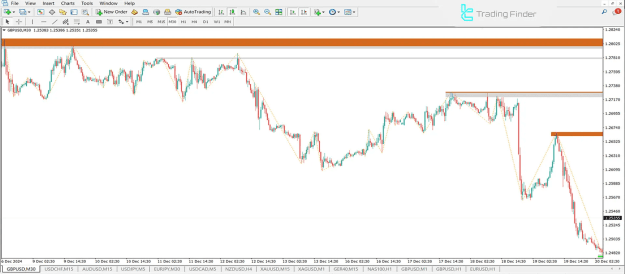
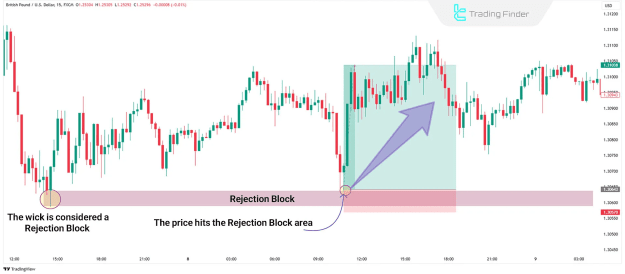
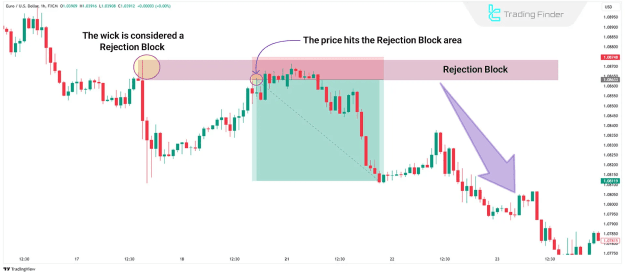
This powerful concept teaches traders to identify key areas where professional money enters or exits positions, typically occurring at major support/resistance levels after liquidity sweeps. By studying these rejection patterns, forex traders gain insight into market structure and can develop high-probability trading strategies with clearly defined risk parameters, ultimately improving their ability to anticipate and capitalize on potential trend reversals.
TP & SL Tool: Risk Reward Ratio Calculator RRR MT4 | Prop Firm Protector: Trade Assist Prop Firm Plus TF Expert MT4 | Money Management + DrawDown Protector: Trade Panel Prop Firm Drawdawn Limiter Pro MT4 |Get a free Expert Advisor license via Telegram and WhatsApp
New chat These powerful structures typically form:
- At major swing highs/lows
- After liquidity sweeps
- Near institutional order clusters
Traders use these blocks to identify high-probability reversal zones for optimal trade entries.
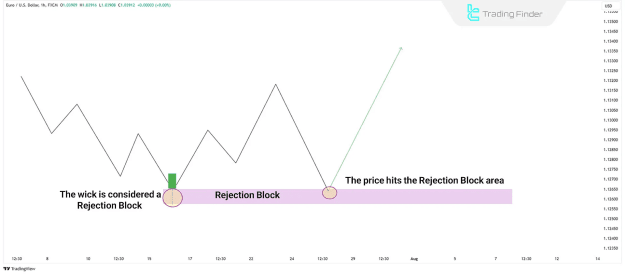
The Mechanics Behind Rejection Blocks
When price approaches a key level:
- Liquidity Absorption occurs as stops get triggered
- Price Rejection manifests as long wicks on candles
- Reversal Confirmation follows as momentum shifts
Specialized tools help detect these zones:
- MT4/MT5 Rejection Block Indicators
- TradingView Rejection Block Scanner
Trading the Two Types of Rejection Blocks
Bullish Rejection Blocks: The Springboard Setup
Formation:
- Long lower wick at support
- Clear absorption of sell-side liquidity
Execution:
Entry: On retest below candle body (stop hunt)
Stop Loss: 10-20 pips below the block
Target: Previous swing high
Bearish Rejection Blocks: The Trap Door Setup
Formation:
- Long upper wick at resistance
- Buy-side liquidity sweep
Execution:
Entry: On retest above candle body (liquidity grab)
Stop Loss: 10-20 pips above the block
Target: Nearest swing low
Why Professional Traders Trust Rejection Blocks
- High Win Rate
- Forms at 80-90% Fibonacci levels
- Acts as final reversal zone in market cycles
- Clear Risk Management
- Tight stops (10-20 pips)
- Favorable risk-reward ratios
- Institutional Validation
- Aligns with smart money concepts
- Confirms with order flow dynamics
Mastering Rejection Block Trading
Pro Tips for Success:
- Combine with market structure breaks
- Wait for confirmation candles
- Use volume profile for added confluence
Advanced Tools for Rejection Trading:
[Smart Money Dashboard for MT4/MT5]
[Liquidity Heatmap Indicator]
[Institutional Order Flow Scanner]
Final Thoughts
Elevating Your Trading Edge
Rejection Blocks offer traders a strategic advantage by:
![]() Pinpointing exact reversal zones
Pinpointing exact reversal zones
![]() Providing clear entry/exit signals
Providing clear entry/exit signals
![]() Minimizing risk exposure
Minimizing risk exposure