EDIT: before reading this thread please note that what started out as a strategy has now evolved considerably and the focus has changed.
This has come about largely because of issues people were having with the indicator code, which did not work for people where the currency pairings had 'suffixes'. Other people had difficulty getting the arrows to appear for other reasons. In the end I was spending way too much time trying to fix individual problems and it became evident that what I originally had planned for this thread was unachievable due to too many people having issues getting the indicator to function correctly.
So the thread has changed focus and is now largely based around the ongoing development of the BTBA indicator, and how people can use it as part of their own strategy. The BTBA indicator itself has been recoded in a way that allows ANYBODY to use it on ANY currency pair, but it is not recommended to use it as a 'standalone' option.
It is best to use it as a 'confluence tool'. It is very good at indicating the current directional bias, but when used in confluence with other ideas you will have more success using it.
Much of the original Post #1 below is now shown asstrikethrough as it is no longer relevant to the updated focus of this thread.
With all that being said, welcome to the thread...
Hi all. It's been many years since I posted in here, but I think I'm ready to give this another shot and share with you something I have created, which some of you might appreciate.
This below strategy has helped me pass many Prop Firm challenges, and it is my hope that it might offer people in this Community the same results.
But BEFORE we get too carried away, this strategy (like ANY strategy) is only one piece of the puzzle. Like ALL strategies, the biggest component of success is MINDSET and being responsible with RISK. This strategy is no different - it works well when traded responsibly.
Notes Before:
1) This strategy / indicator is designed for trading XAUUSD only - the indicator will only work when used with XAUUSD. The indicator now works with ALL currency pairs.
2) This strategy utilises a number of indicators, some of which I have taken and recoded slightly, some I have personally developed from scratch. I thank the developers of the indicators that I have 'borrowed' and then updated.
I have been a fan of a few indicators and in recent months I have combined these into a single indicator which prints an alert arrow to the screen indicating trend direction.
I call this main indicator 'Biting the Big Apple' (BTBA) as it is designed to indicate trend direction when the market is moving substantially with volume, which is best seen during the overlap of the London and NY trading sessions.
The first indicator I have incorporated into the BTBA is actually a combination of the standard MT4 indicators BullsPower and BearsPower, which I have called 'BULLBEAR HISTO'. When the histogram bar is Blue it indicates bullish power, and when the histogram is Red is indicates bearish power. This indicator just measures the absolute value of (BullsPower - BearsPower) and if the resulting value is > '0' is indicates Bulls are in control, and vice-versa.
The next indicator I have incorporated is the Waddah Attar Explosion. I use this as a trade entry filter. The arrows will only print to the screen when the blue / red histogram bars are beyond the 'Explosion' zone, as indicated by the yellow line. (Please note the version of this indicator that I used has an 'ON/OFF' button and for some reason this is not working correctly - button objects will appear on the screen but these do not work and cannot be removed. Such a pain...I will get around to fixing this eventually).
The next indicator I have incorporated is the Tick Volume (TVI) indicator, which works as an oscillator. Buy arrows will only print when the TVI is either of the two blue colours (rising), and Sell arrows will only print if the histogram is either of the two red colours (falling).
And lastly, I have recoded a Currency Strength indicator so it paints XAUUSD lines to the screen. Buy Arrows will be printed to the screen when the strength of the XAU Gold line is above above the DarkGreen USD line (and vice-versa).
When ALL FOUR of these indicators 'agree', either a White or a Black arrow will print to the screen. They work well together and help filter out bad trades much of the time.
Also combined into the main BTBA indicator are the following additional features:
- a Volume filter, which you can use so arrows only appear when the current 'Tick Volume' is beyond a certain threshold;
- a Time filter, so arrows only print between the times that you set.
The Volume filter is set at '0' as default, but for XAUUSD I find using a value of '150' is a decent value to test. But to be honest, if you are only trading the London/NY overlap, volume is already high enough to not worry about using this setting. I personally leave it at '0'.
The Time filter has 4 values:
- NY From (hour) Latest indicator version now has Start_From_Hour, Start_From_Min, End_To_Hour and End_To_Min.
- NY From (min)
- NY To (hour)
- NY To (min)
The default 'From' values are '13' and '0' (these represent the NY open time for my broker), and I use '16' and '59' as the closing 'To' values. These values pick up the bulk of the trading volume in that session, but of course they can be changed. Changing each of the 'From' values to '0' and the 'To' vales to '23' and '59' will mean arrows will appear all day. You will need to work out which values work for your broker if you want to limit them to only appear during certain session times.
STRATEGY: BUY TRADE EXAMPLE
SIMPLE!
If you see a White arrow appear on the screen at the close of a candle, open a BUY (opposite for SELL - Sell entries are indicated by a Black arrow.)
RISK SETTINGS:
I personally risk 1% of my available equity per trade, and as we are trading XAUUSD and the decimal point is different to standard currency pairs, I use a 100 pip SL, (which is equivalent to a '10' pip SL for most 'normal' pairs).
Depending on how fast the market is moving I might increase the SL. I have an EA which manages my risk and automatically places my SL as I enter a trade. If I enter '250' pips as my SL this Trade Management EA automatically adjusts the lot size to keep the risk at 1%.
I use another EA on another chart window and this monitors profit levels. It will automatically close a trade once it achieves 1.1% profit. This means I have profited my desired 1% PLUS an additional 0.1% which more than covers the spread.
I don't trade news. The strategy easily earns enough pips without taking stupid risks.
In my experience this strategy can easily gain multiple 1% profits in any single trading session. I prefer to take quick wins and bank them rather than go after a higher % return and risk the market turning and taking me out.
But yes, I know...this is a 1:1 R:R strategy, which some people may find a bit strange. But this suits me fine as I know the strategy and the indicator inside out. I have tested and refined this indicator for more than 6 months, so I have learned to trust the signals it provides and I have peace of mind that these signals will give me a win way more often than a loss, so I am okay with a 1:1.
Maybe you might have your own indicator you rely on for taking profits, i.e. Support and Resistance levels, Order Blocks and 'Fair Value Gaps' (if you are an 'ICT' trader), Fib levels etc. If a 1:1 doesn't suit you, then please, by all means, "you do you..."
I stop trading when I hit 2% profit for the day. This could take a few minutes or it might take a while. There is always plenty more on the table but I find it helps me to stay disciplined by saying 'NO' to any more than this. 2% a day is already an amazing achievement, (especially when trading a $200K prop firm account!) so why be greedy?
I also stop trading for the day if I hit 2% in losses. This rarely happens, but it can. It's important in these moments to take a break and come back fresh...(live to fight another day!)
I stop trading for the week after I hit 5%. I trade to live - I don't live to trade.
IMPORTANT: If an opposite coloured arrow appears at the close of the next candle after you have just entered a trade, TRUST THE ARROW - close your open trade, take the loss and move on.
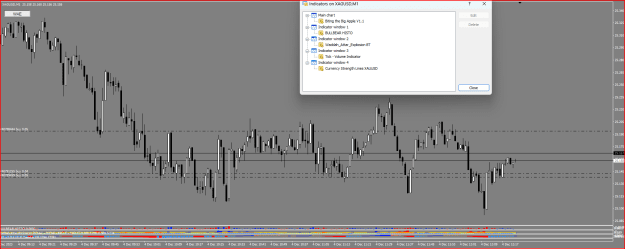
INDICATORS: REFER TO POST #1020 for updated indicators
Attached are the following files:
- Biting the Big Apple V1.1.ex4 (main file)
- BULLBEAR HISTO.ex4
- Waddah_Attar_Explosion BT.ex4
- Tick - Volume Indicator,ex4
- Currency Strength Lines XAUUSD.ex4
You will need to have all five of these in your /Indicators folder so the BTBA Indicator can work, but the only indicator you need to add to your chart window is the 'Biting the Big Apple' indicator.
Please note I am only providing .ex4 files at this time, so please do not ask for the .mq4 files. The indicator values have been tested and tweaked to the point where they offer a 'sweet spot' for consistent wins - there is no point in me offering the .mq4 file so someone can then go and change something, it's just not necessary.
If needed I have also included a Template file Biting the Big Apple.tpl which needs to go into your /Templates folder.
I have a number of other indicators I use which are useful also. One prints vertical lines to the chart at certain session times, I have a great one for showing Support and Resistance (in multiple time frames) and another which shows Fair Value Gaps (which I also use as further confluence when entering a trade). There's one that shows real-time profit / loss %, one that shows candle closing time remaining etc. I am happy to share these if need be.
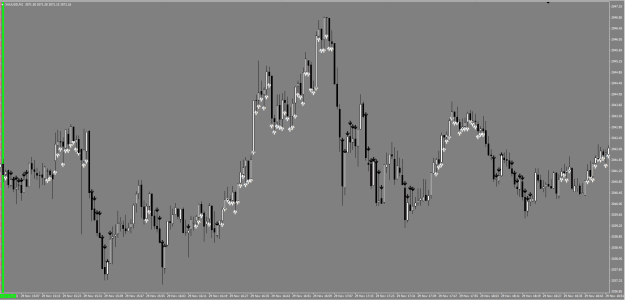
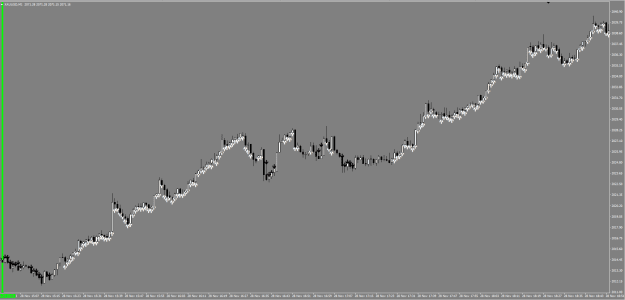
SCREENSHOTS:
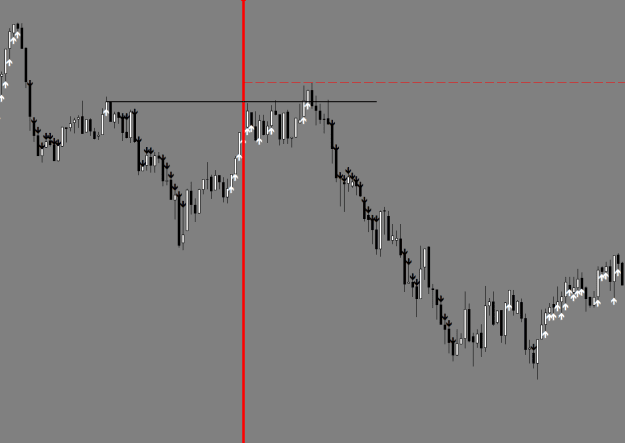
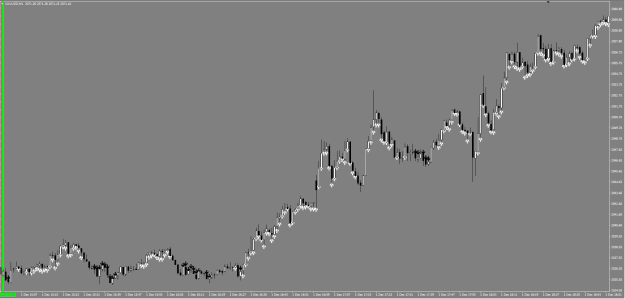
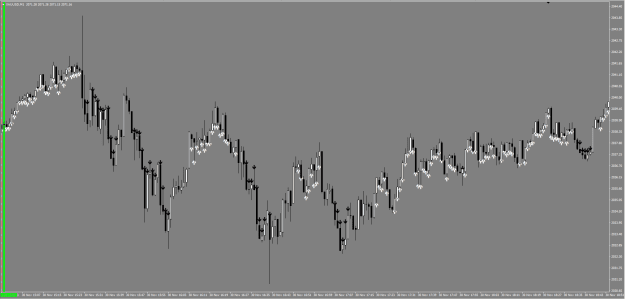
I have attached 4 screenshots. Screenshot 1 was the most recent session last Friday, screenshot 2 was the day before, screenshot 3 the day before that and so on.
As you will see, some days are absolute 'goldmines' when the market is trending strongly and you see white arrows forever, and on other days it meanders a bit up and down so you see a fair mix of white and black. Regardless of what is happening on any given day however, there is always the chance of picking up a solid % gain if you are trading the London close / NY open trading session.
HOUSEKEEPING:
Lastly, just the usual housekeeping stuff...
- I don't have time each day to come here and answer questions. I do plan to check in every so often, maybe a few times a week, but I am incredibly busy with many other projects so I just ask that people are patient and I will get back to you eventually. The last thread I started years ago became a bit stressful and I don't want a repeat of that this time around.
- At this stage I am not interested in making further changes to the indicator code, i.e. adding new features like push notifications and sound alerts etc. It is what it is, and it works well enough without needing to be updated. In time I may be interested in adding new features, but right now I just don't have time.
- I am not interested in letting this thread change its' focus to turning this indicator into an EA, so please don't ask.
- negative behaviour of any kind is unwelcome in this thread. Please be respectful of others in the thread.
- I am offering this to the FF community in the hope that someone will find it useful. This community has benefited me no end over the years and this is one small way I feel I can give back. For that reason I ask that people are respectful of the work that I have put into this, and use the indicator as it is intended, rather than complain about missing features etc.
And that's about it. I really hope people find this a useful tool to help bring in consistent profits.
EDIT: sorry guys, I realised just now that two of the buffers for one of the indicators I use inside BTBA were incorrect. This resulted in arrows occasionally appearing where they shouldn't. This has been updated and the previous version deleted from here. Please download the current version, Biting the Big Apple V1.1.
EDIT: December 11 2023 - LATEST INDI VERSION 2.0 NOW AVAILABLE - GO TO POST #138. Make sure you download all other indicators from that post and copy into your /Indicators folder, replacing old with new.
EDIT: December 20 2023 - LATEST INDI VERSION 3.0 NOW AVAILABLE - GO TO POST #365. Make sure you download all indicators from that post and copy into your /Indicators folder, replacing old with new.
EDIT: December 22 2023 - LATEST INDI VERSION 3.1 NOW AVAILABLE - GO TO POST #413. This version has slightly modified code along with added exit alert arrow options.
EDIT: December 28 2023 - LATEST INDI VERSION 3.2 NOW AVAILABLE - GO TO POST #445. Make sure you download all other indicators from that post and copy into your /Indicators folder, replacing old with new. DELETE ALL PREVIOUS INDICATORS / TEMPLATES AS THESE ARE NO LONGER BEING SUPPORTED.
EDIT: January 10 2024 - LATEST INDI VERSION 4.0 NOW AVAILABLE - GO TO POST #615. Make sure you download all other indicators from that post and copy into your /Indicators folder, replacing old with new. DELETE ALL PREVIOUS INDICATORS / TEMPLATES AS THESE ARE NO LONGER BEING SUPPORTED.
EDIT: January 15 2024 - LATEST INDI VERSION 4.5 NOW AVAILABLE - GO TO POST #663. Make sure you download all other indicators from that post and copy into your /Indicators folder, replacing old with new. DELETE ALL PREVIOUS INDICATORS / TEMPLATES AS THESE ARE NO LONGER BEING SUPPORTED.
EDIT: March 26 2024 - LATEST INDI VERSION 5.0 NOW AVAILABLE - GO TO POST #909. Make sure you download all other indicators from that post and copy into your /Indicators folder, replacing old with new. DELETE ALL PREVIOUS INDICATORS / TEMPLATES AS THESE ARE NO LONGER BEING SUPPORTED.
EDIT: April 2 2024 - LATEST INDI VERSION 5.2 NOW AVAILABLE - GO TO POST #937. Make sure you download all other indicators from that post and copy into your /Indicators folder, replacing old with new. DELETE ALL PREVIOUS INDICATORS / TEMPLATES AS THESE ARE NO LONGER BEING SUPPORTED.
EDIT: April 29 2024 - LATEST INDI VERSION 6.0 NOW AVAILABLE - GO TO POST #1020. Make sure you download all other indicators from previous posts and copy into your /Indicators folder, replacing old with new. DELETE ALL PREVIOUS INDICATORS / TEMPLATES AS THESE ARE NO LONGER BEING SUPPORTED.
This has come about largely because of issues people were having with the indicator code, which did not work for people where the currency pairings had 'suffixes'. Other people had difficulty getting the arrows to appear for other reasons. In the end I was spending way too much time trying to fix individual problems and it became evident that what I originally had planned for this thread was unachievable due to too many people having issues getting the indicator to function correctly.
So the thread has changed focus and is now largely based around the ongoing development of the BTBA indicator, and how people can use it as part of their own strategy. The BTBA indicator itself has been recoded in a way that allows ANYBODY to use it on ANY currency pair, but it is not recommended to use it as a 'standalone' option.
It is best to use it as a 'confluence tool'. It is very good at indicating the current directional bias, but when used in confluence with other ideas you will have more success using it.
Much of the original Post #1 below is now shown as
With all that being said, welcome to the thread...
Hi all. It's been many years since I posted in here, but I think I'm ready to give this another shot and share with you something I have created, which some of you might appreciate.
This below strategy has helped me pass many Prop Firm challenges, and it is my hope that it might offer people in this Community the same results.
But BEFORE we get too carried away, this strategy (like ANY strategy) is only one piece of the puzzle. Like ALL strategies, the biggest component of success is MINDSET and being responsible with RISK. This strategy is no different - it works well when traded responsibly.
Notes Before:
2) This strategy utilises a number of indicators, some of which I have taken and recoded slightly, some I have personally developed from scratch. I thank the developers of the indicators that I have 'borrowed' and then updated.
I have been a fan of a few indicators and in recent months I have combined these into a single indicator which prints an alert arrow to the screen indicating trend direction.
I call this main indicator 'Biting the Big Apple' (BTBA) as it is designed to indicate trend direction when the market is moving substantially with volume, which is best seen during the overlap of the London and NY trading sessions.
The first indicator I have incorporated into the BTBA is actually a combination of the standard MT4 indicators BullsPower and BearsPower, which I have called 'BULLBEAR HISTO'. When the histogram bar is Blue it indicates bullish power, and when the histogram is Red is indicates bearish power. This indicator just measures the absolute value of (BullsPower - BearsPower) and if the resulting value is > '0' is indicates Bulls are in control, and vice-versa.
The next indicator I have incorporated is the Waddah Attar Explosion. I use this as a trade entry filter. The arrows will only print to the screen when the blue / red histogram bars are beyond the 'Explosion' zone, as indicated by the yellow line. (Please note the version of this indicator that I used has an 'ON/OFF' button and for some reason this is not working correctly - button objects will appear on the screen but these do not work and cannot be removed. Such a pain...I will get around to fixing this eventually).
The next indicator I have incorporated is the Tick Volume (TVI) indicator, which works as an oscillator. Buy arrows will only print when the TVI is either of the two blue colours (rising), and Sell arrows will only print if the histogram is either of the two red colours (falling).
And lastly, I have recoded a Currency Strength indicator so it paints XAUUSD lines to the screen. Buy Arrows will be printed to the screen when the strength of the XAU Gold line is above above the DarkGreen USD line (and vice-versa).
When ALL FOUR of these indicators 'agree', either a White or a Black arrow will print to the screen. They work well together and help filter out bad trades much of the time.
Also combined into the main BTBA indicator are the following additional features:
- a Volume filter, which you can use so arrows only appear when the current 'Tick Volume' is beyond a certain threshold;
- a Time filter, so arrows only print between the times that you set.
The Volume filter is set at '0' as default, but for XAUUSD I find using a value of '150' is a decent value to test. But to be honest, if you are only trading the London/NY overlap, volume is already high enough to not worry about using this setting. I personally leave it at '0'.
The Time filter has 4 values:
The default 'From' values are '13' and '0' (these represent the NY open time for my broker), and I use '16' and '59' as the closing 'To' values. These values pick up the bulk of the trading volume in that session, but of course they can be changed. Changing each of the 'From' values to '0' and the 'To' vales to '23' and '59' will mean arrows will appear all day. You will need to work out which values work for your broker if you want to limit them to only appear during certain session times.
INDICATORS: REFER TO POST #1020 for updated indicators
I have a number of other indicators I use which are useful also. One prints vertical lines to the chart at certain session times, I have a great one for showing Support and Resistance (in multiple time frames) and another which shows Fair Value Gaps (which I also use as further confluence when entering a trade). There's one that shows real-time profit / loss %, one that shows candle closing time remaining etc. I am happy to share these if need be.
SCREENSHOTS:
I have attached 4 screenshots. Screenshot 1 was the most recent session last Friday, screenshot 2 was the day before, screenshot 3 the day before that and so on.
As you will see, some days are absolute 'goldmines' when the market is trending strongly and you see white arrows forever, and on other days it meanders a bit up and down so you see a fair mix of white and black. Regardless of what is happening on any given day however, there is always the chance of picking up a solid % gain if you are trading the London close / NY open trading session.
HOUSEKEEPING:
Lastly, just the usual housekeeping stuff...
- I don't have time each day to come here and answer questions. I do plan to check in every so often, maybe a few times a week, but I am incredibly busy with many other projects so I just ask that people are patient and I will get back to you eventually. The last thread I started years ago became a bit stressful and I don't want a repeat of that this time around.
- At this stage I am not interested in making further changes to the indicator code, i.e. adding new features like push notifications and sound alerts etc. It is what it is, and it works well enough without needing to be updated. In time I may be interested in adding new features, but right now I just don't have time.
- I am not interested in letting this thread change its' focus to turning this indicator into an EA, so please don't ask.
- negative behaviour of any kind is unwelcome in this thread. Please be respectful of others in the thread.
- I am offering this to the FF community in the hope that someone will find it useful. This community has benefited me no end over the years and this is one small way I feel I can give back. For that reason I ask that people are respectful of the work that I have put into this, and use the indicator as it is intended, rather than complain about missing features etc.
And that's about it. I really hope people find this a useful tool to help bring in consistent profits.
EDIT: March 26 2024 - LATEST INDI VERSION 5.0 NOW AVAILABLE - GO TO POST #909. Make sure you download all other indicators from that post and copy into your /Indicators folder, replacing old with new. DELETE ALL PREVIOUS INDICATORS / TEMPLATES AS THESE ARE NO LONGER BEING SUPPORTED.
EDIT: April 29 2024 - LATEST INDI VERSION 6.0 NOW AVAILABLE - GO TO POST #1020. Make sure you download all other indicators from previous posts and copy into your /Indicators folder, replacing old with new. DELETE ALL PREVIOUS INDICATORS / TEMPLATES AS THESE ARE NO LONGER BEING SUPPORTED.
Attached Image(s) (click to enlarge)
Attached File(s)
Trade to Live - Don't Live to Trade